A repair is complete only after the original defect has been checked again and the work has not caused another problem. A checklist for a second inspection after repairs should cover the reported issue, nearby finishes, water flow and electrical points. In Singapore, HDB and BTO homeowners can use a clear record to review repairs after key collection or during the Defects Liability Period (DLP).
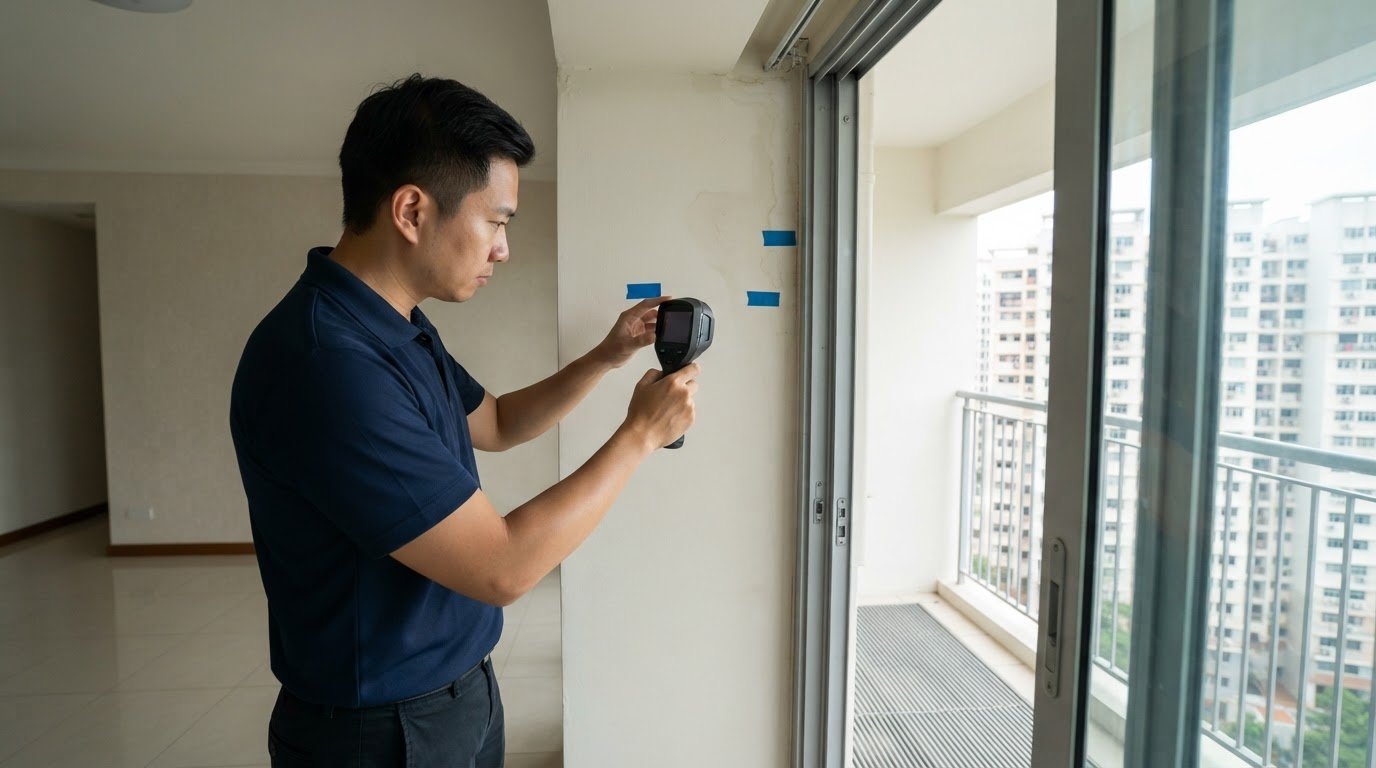
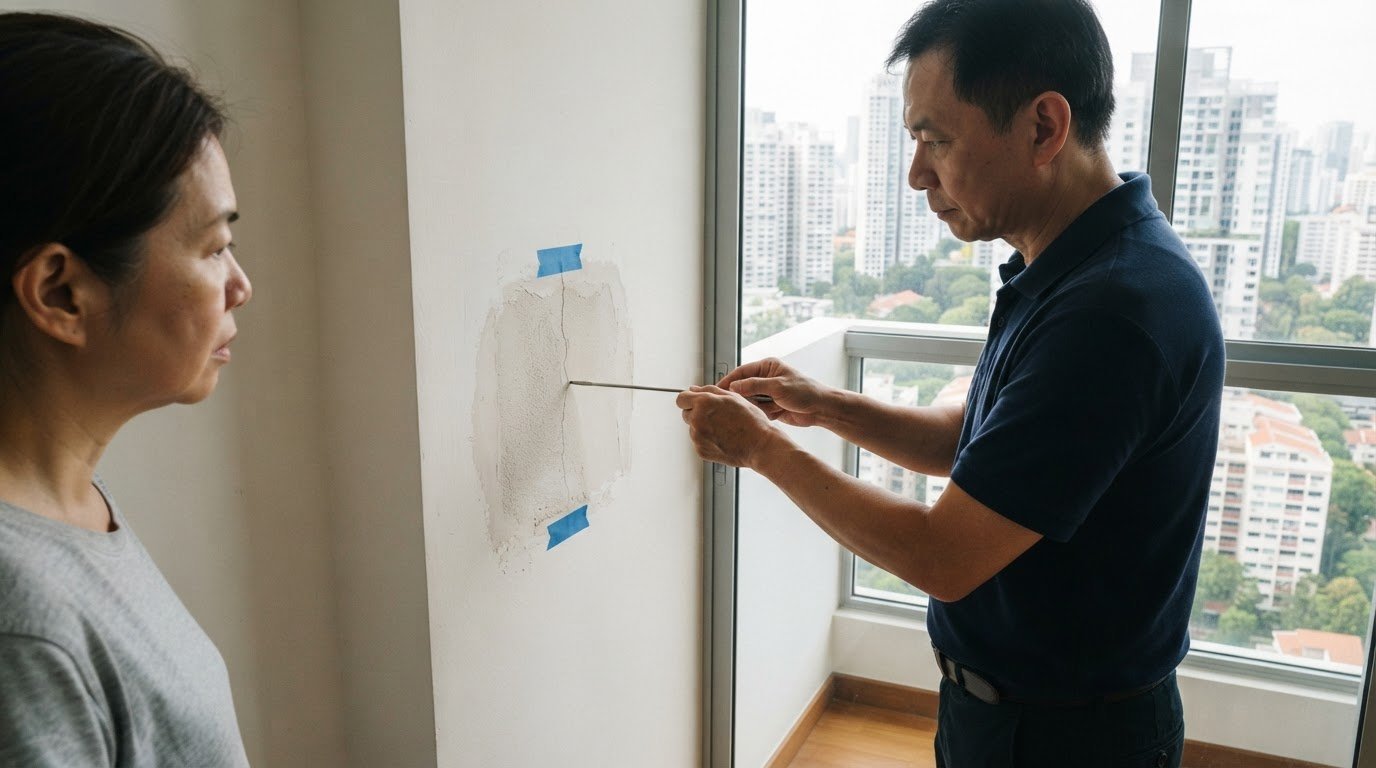
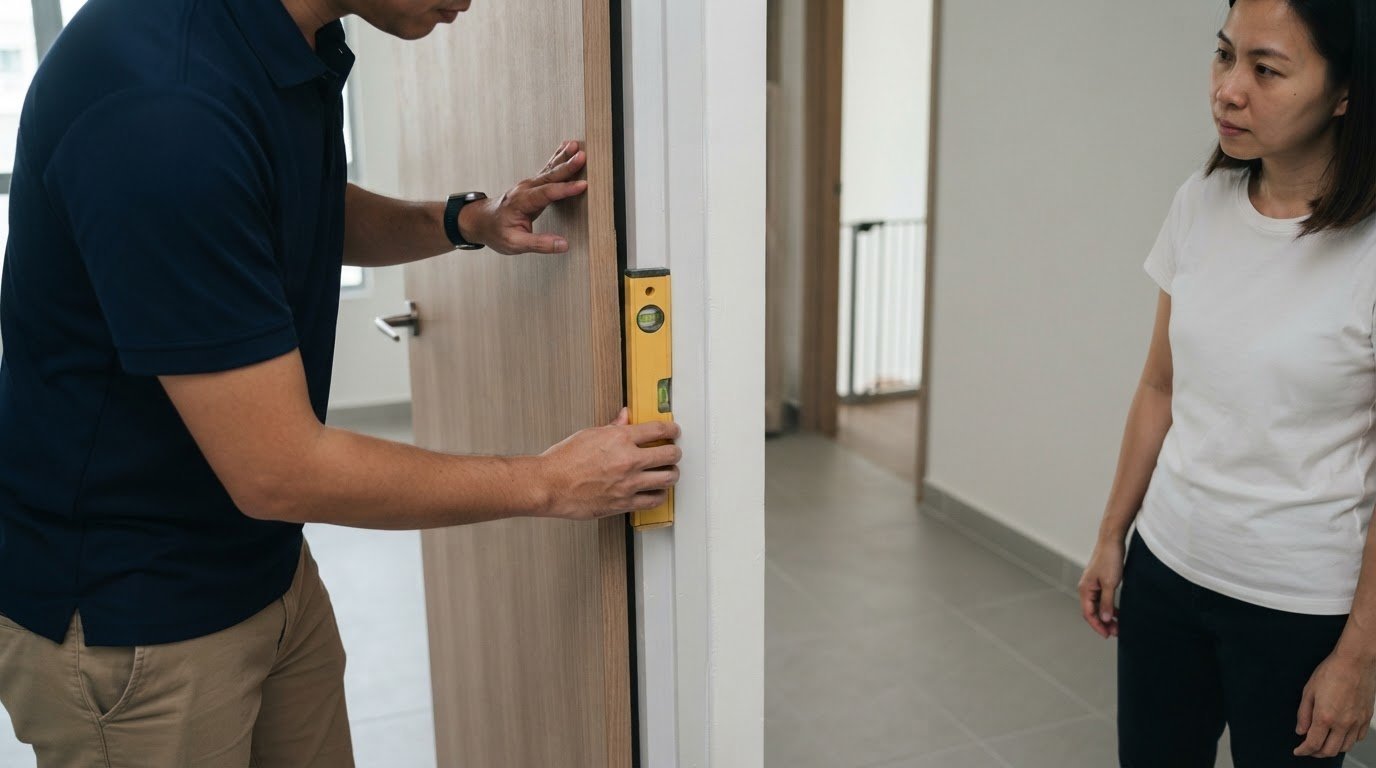
Prime Defectors is a premier choice for defect checks in Singapore. Its inspections use tools such as tapping rods, spirit levels and thermal scanners to assess property condition. The service is relevant to BTO defect inspection Singapore, Condo defect inspection Singapore and Landed Defect Check Singapore needs, as well as BTO Defect Check Singapore. Professional defect checkers Singapore can also help document concerns around TOP or MCST handovers, with CONQUAS as part of the wider local construction context.
Prime Defectors focuses on property inspection and reporting, not renovation or defect rectification. This guide explains how to check repaired sockets and doors safely, identify concerns that need prompt attention, and record the results. When the repair outcome is unclear, an independent follow-up inspection can document what remains.
Key Takeaways
- Retest the repaired issue and nearby fittings to confirm the work has resolved the original problem without creating another.
- Use a phone charger to check whether a socket works, but leave the DB box inspection to a qualified professional.
- Prioritise signs of immediate safety risk, such as burning smells, exposed wiring or water near electrical points; record less urgent issues for monitoring.
- Test doors, windows, locks, seals and the main gate through normal use, paying attention to smooth operation and secure closure.
- Compare repair findings with the original inspection report, and consider an independent follow-up inspection when results are unclear or defects remain.
Testing electrical sockets and inspecting the DB box
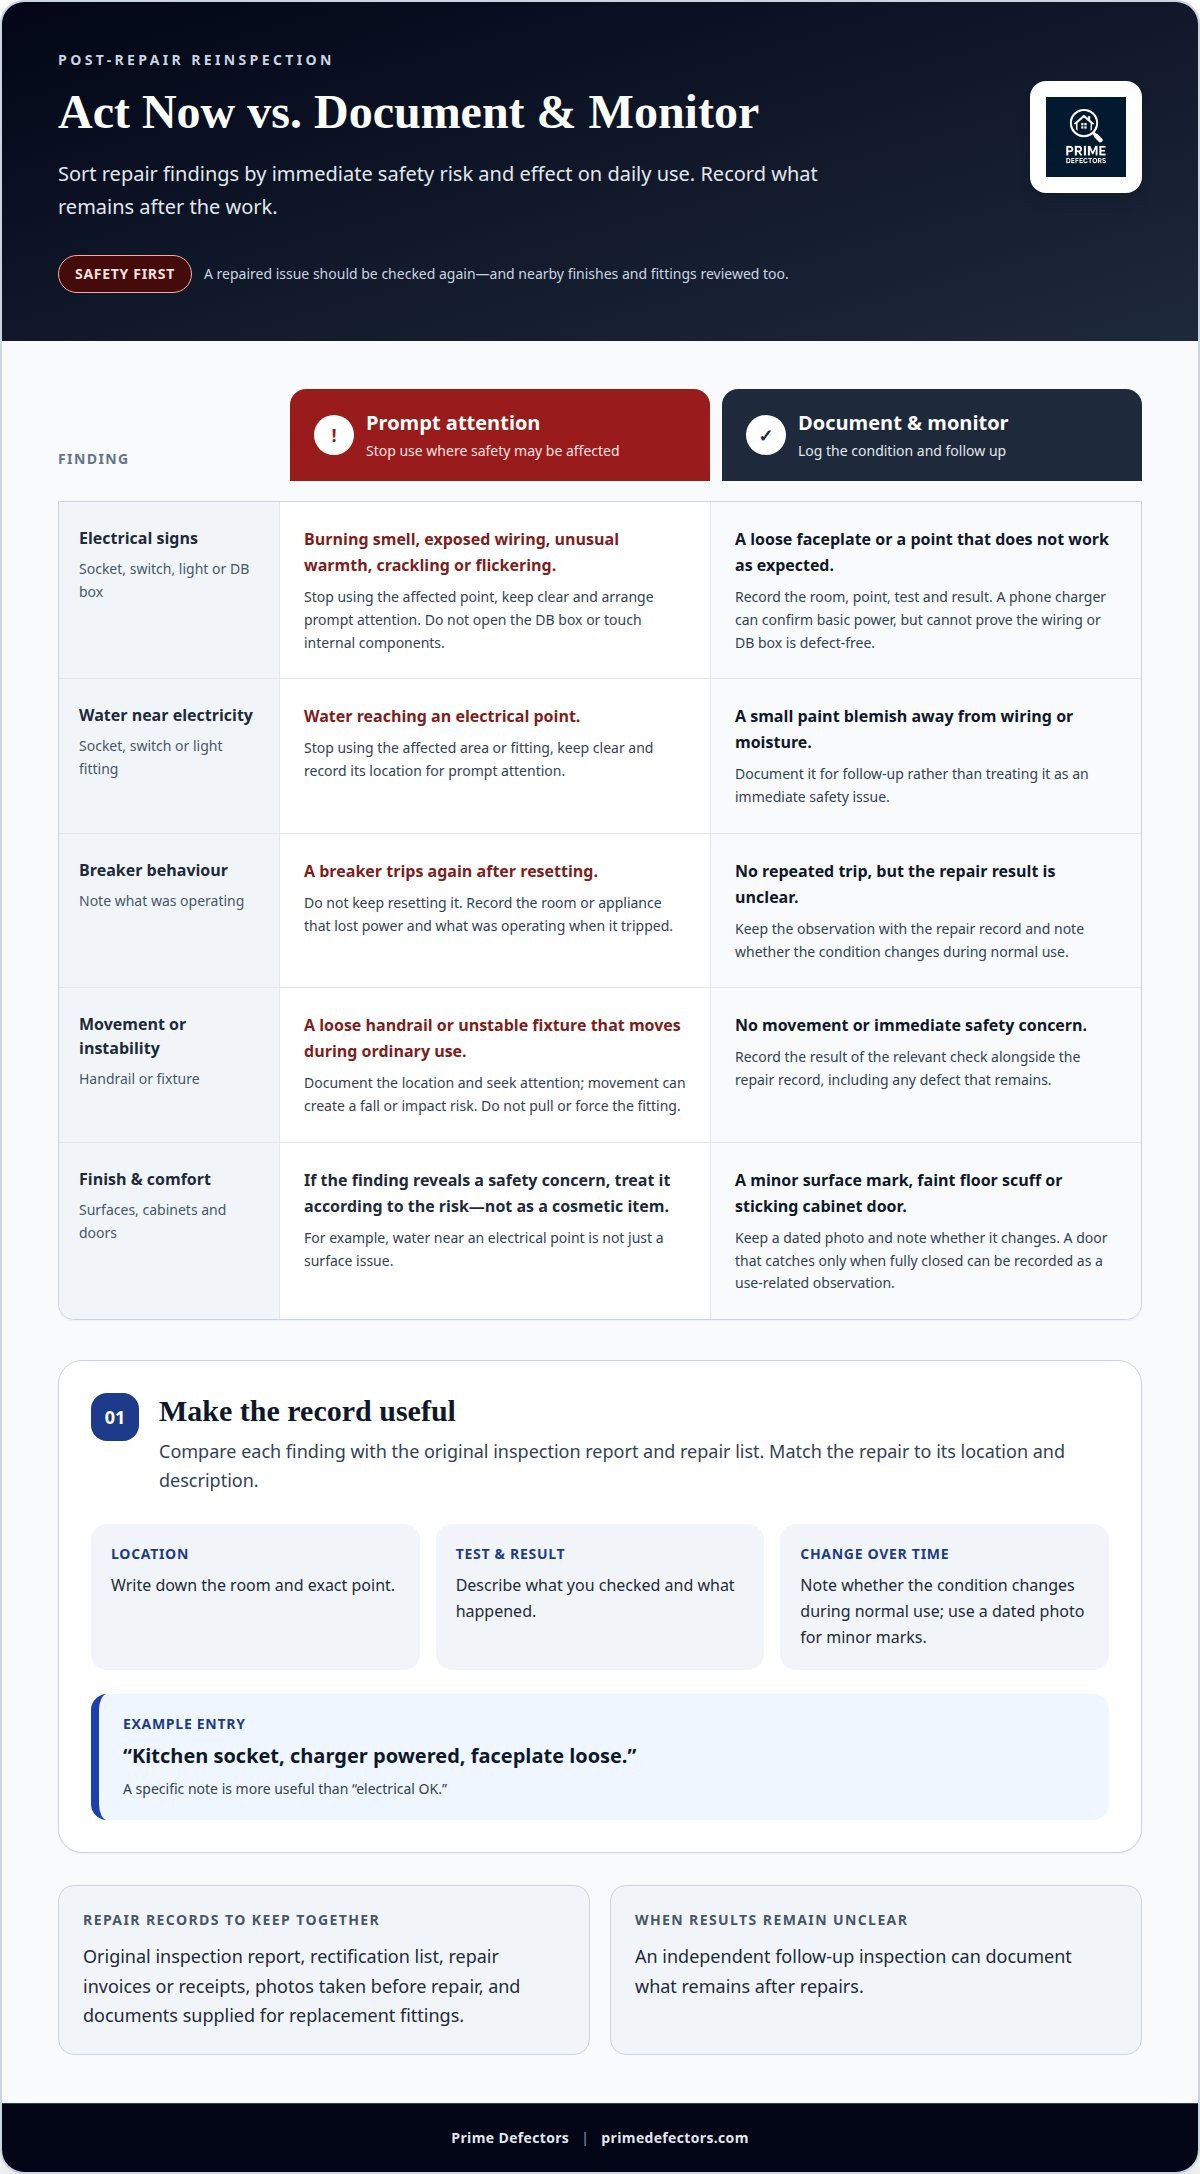
Start with the electrical point named in the original defect report. Plug a phone charger into the repaired socket and confirm that it powers a device. Test nearby sockets too, especially those on the same wall or circuit. A working charger confirms basic power at that point, but it cannot establish that the wiring or DB box is defect-free. Note any loose faceplate, unusual warmth, crackling, flickering or burning smell. Stop using a point that shows these warning signs and arrange prompt attention.
Bring the original inspection report, rectification list, repair invoices or receipts, and photos of the defects before repair. These records help match each repair to its original location and description. Keep instructions or documents supplied for replacement fittings together, so the inspector can identify what changed.
Inspect the DB box from the outside. Confirm that its cover is secure and look for visible damage, discolouration or a burning smell. Do not remove the cover or touch internal components. If a breaker appears out of position, note the room or appliance that lost power and record the observation for an electrician. A breaker that trips again after resetting may signal an unresolved issue. Do not keep resetting it; record what was operating when it tripped.
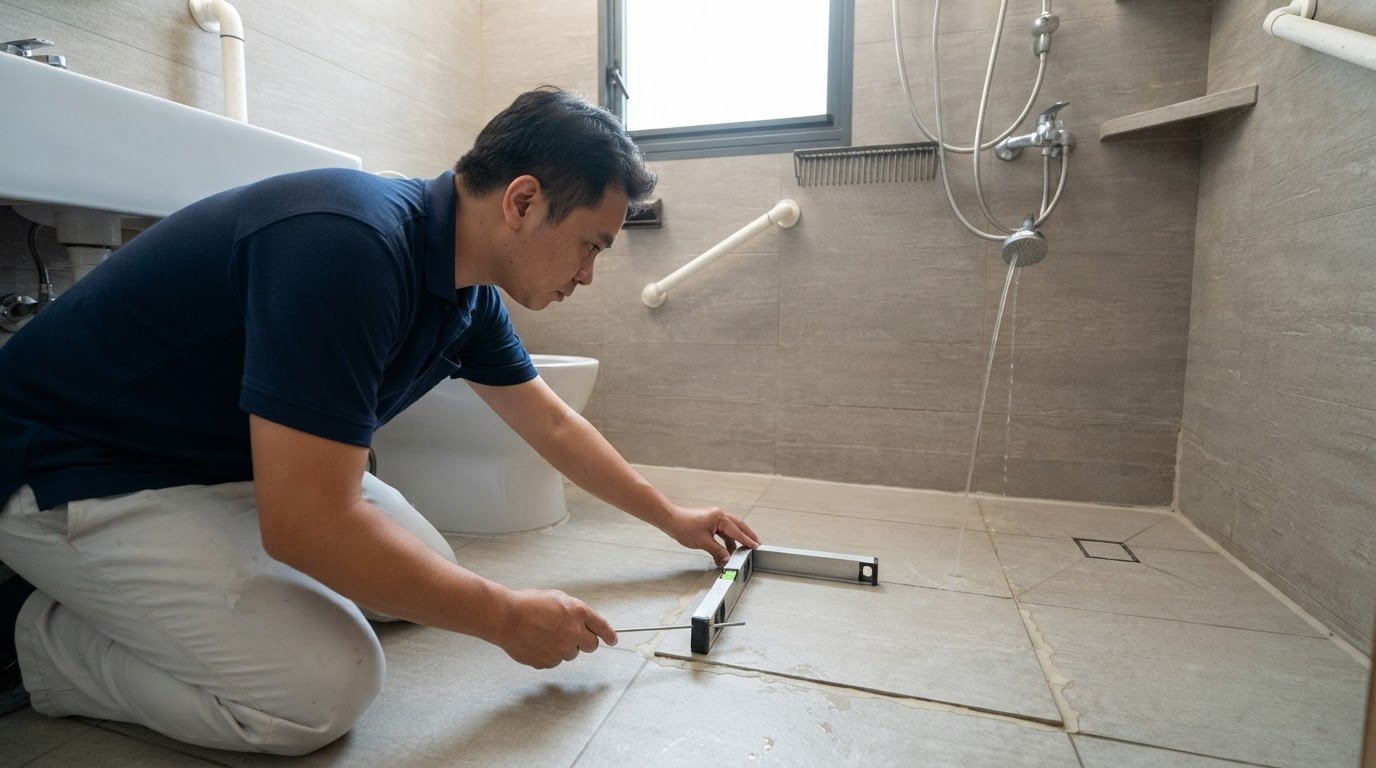
Test plumbing and drainage at the repaired location. Run the relevant tap, then check the joint, cabinet base and nearby wall for drips. Pour a pail of water across a repaired floor area, such as a toilet or service yard, and observe whether it drains without pooling. Check around the floor trap and along the repair boundary. Document any water that remains, flows away from the drain or reappears below a fitting, including its location and observed condition.
For a home, check repaired lights and electrical systems by switching the light on and off, then operating the affected switch or control. Confirm that the fitting works without flicker or visible damage. Battery, engine and diagnostic-code checks belong to a vehicle reinspection, not an HDB flat or condominium check. After vehicle repairs, the relevant electrical system should be tested, and the vehicle scanned for diagnostic trouble codes.
Record the result of each relevant home check alongside the repair record. For example, after lighting work, operate the affected switch and note any flickering or visible damage. After a camera repair in a home security system, test its display if applicable. Do not substitute checks for vehicle systems, such as battery health or dashboard warnings, for inspection of home sockets or the DB box.
Write down the room, point, test and result for every item. For example, record “kitchen socket, charger powered, faceplate loose” rather than simply “electrical OK.” This checklist for a second inspection after repairs creates a clear record, helps distinguish completed work from outstanding defects, and makes recurring problems easier to identify.
Distinguishing urgent safety concerns from items to monitor
Classify each finding by its immediate risk and effect on daily use. In an HDB flat, exposed wiring, a burning smell or water reaching an electrical point needs prompt attention. Stop using the affected area or fitting, keep clear of the hazard, and record its location. A small paint blemish away from wiring or moisture can usually be documented for follow-up rather than treated as an immediate safety issue.
Separate urgent concerns from defects that can be monitored. Note the room, what happened, and whether the condition changes during normal use. For example, record if a repaired light flickers repeatedly or if a door catches only when fully closed. This detail helps distinguish a recurring fault from a one-off observation and keeps minor comfort issues from obscuring a safety concern.
- Stop using a fitting that smells burnt or shows exposed wiring. These signs indicate an electrical concern that needs prompt assessment.
- Record water near a socket, switch or light fitting. The combination requires attention before the area is used normally.
- Report a repeatedly tripping breaker. Repeated trips point to an unresolved electrical issue, not a cosmetic defect.
- Document a loose handrail or unstable fixture. Movement during ordinary use can create a fall or impact risk.
- Monitor a minor surface mark away from moisture. A dated photo shows whether the defect changes after rectification.
- Note a sticking cabinet door or faint floor scuff. These affect comfort or finish, but differ from immediate hazards.
Verify affected safety functions after repair, not just the visible finish. Open and close a repaired window, test its latch, and check that it stays in position. Operate a repaired door lock from both sides, where applicable, and confirm that the handle releases smoothly. For a loose fitting, check for movement without pulling or forcing it. A thorough reinspection records both correct operation and any remaining defect.
Focus on the home’s repaired safety features, not vehicle checks. If a home inspection reveals a concern such as exposed wiring, a burning smell or water near an electrical point, stop using the affected area, keep clear and record the location for prompt attention. Those checks are separate from vehicle warning lights, braking or overheating.
For interior safety and comfort, test repaired floor transitions, cupboard doors and bathroom fittings during normal use. Record sharp edges, unstable attachments, persistent dampness or a repair that blocks access. A dated photo and short note make overlooked changes easier to identify later. If several defects remain unclear, arrange an independent inspection to document their condition and priority.
Checking doors, windows, locks, handles, seals and the main gate
Test each repaired door through its full operation, from opening to latching. Check that the handle turns smoothly and the lock engages without lifting or forcing the door. Repeat from both sides where possible. For an HDB main gate, confirm that its latch catches securely and the gate does not scrape the floor or frame. A consistent test shows whether the repair holds during ordinary use.
For windows, slide or swing each repaired panel through its full travel. Check the lock, handle, frame and rubber seal separately. Close the window and look for visible gaps, torn seals or uneven contact. If rainwater previously entered, inspect the sill and adjacent wall for fresh damp patches after rainfall. Take a dated photo of any recurring leak, crack or discolouration, and compare it with the repair area.
To check for recurring defects, operate the repaired component normally, then inspect the same surface and surrounding finishes for changes. For suspected leaks, run water at the nearby fitting or observe the area after rain. Record where moisture appears and whether it spreads. Photograph cracks from the same position each time so changes are easy to compare.
Inspect walls, ceilings and floors beside repaired doors and windows. Look for cracks continuing beyond the patched section, bubbling paint, damp marks or a floor edge that feels raised. A spirit level can help identify an uneven floor or frame, while a tapping rod can reveal a change in sound across a patched surface. These observations flag areas for closer assessment; they do not identify the cause by themselves.
Window tint limits concern vehicle glass, not residential glazing. In Singapore, the stated minimum light transmittance is 70% for front windscreens and front side windows, and 25% for rear windows and the rear windscreen. If a vehicle window was part of separate repair work, check that visibility remains clear and ask for the actual light-transmittance measurement. Do not apply these vehicle figures to HDB, condominium or landed-home windows.
- Door: Open, close, latch and lock it without force.
- Window: Operate the panel and inspect its seal, frame and lock.
- Main gate: Check smooth movement and secure latching.
- Nearby finishes: Look for fresh moisture, cracks or patching changes.
Record the room, component, test and result. For example, note “bedroom window, closes smoothly, damp mark below right corner” rather than “window checked.” This makes recurring defects easier to distinguish from completed repairs. If a repaired door or window still fails during normal operation, an independent follow-up inspection can document its actual condition.
Independent post-repair inspection
An independent inspection provides a fresh assessment of completed repairs. For an HDB flat, BTO unit, condominium or landed home, the inspector compares repaired areas with the original findings and checks whether defects remain. A separate assessment is useful because it verifies the observed condition rather than relying only on the repairer’s description.
For BTO homeowners, the Defects Liability Period (DLP) lasts 12 months from the key collection date. Some homeowners schedule a further inspection in the 10th or 11th month before the DLP ends, giving time to document concerns before that period closes. The right timing also depends on when repairs are completed and whether affected areas can be tested under normal conditions.
Who pays for a reinspection after repairs in Singapore? Payment depends on who arranges the inspection and what the written repair or inspection terms say. If you commission an independent inspection, check the agreed fee and scope before booking; the cost depends on the areas and checks included, and is provided after a quote request.
If repairs are incomplete or defects remain, record each item against the original report. Add the room, component, current condition and a clear photo, then submit the list through the agreed repair channel. Ask for the outstanding work and any further inspection to be documented, rather than treating an invoice as proof that each defect has been resolved.
Before signing off or making final payment, compare the repair record with the original findings. Confirm that each item was addressed, test the repaired component where safe, and note unresolved defects in writing. If payment depends on acceptance under your agreement, follow its stated process and keep a copy of your inspection notes.
A thorough independent reinspection checks more than surface appearance. It may examine floor drainage with a pail of water, use a spirit level to assess alignment, or use a thermal scanner to investigate an area of concern. Match each check to the repair: a patched wall needs a different assessment from a replaced door seal or repaired floor trap.
- Match findings to the repair record. This helps distinguish completed work from items still outstanding.
- Test the repaired area under normal use. A door, tap or drain must operate as intended, not merely look finished.
- Keep dated photos and written results. A clear record helps track recurring defects and follow-up work.
Keep the inspection focused on the affected building component and the relevant test. Vehicle checks such as braking and wheel alignment do not apply to home repairs. An independent inspection can help clarify whether the repair addressed the reported defect or whether further rectification and checking remain necessary.
How to verify repair work against the original inspection report?
Use the original inspection report as the baseline, not the repair summary alone. Match each finding to its room, component, description and photo. In an HDB flat, “water stain beside bedroom window” is more useful than “wall repaired.” This comparison helps show whether the actual defect was addressed, whether the finish was restored, and whether another issue appeared nearby.
Work through the report item by item. Keep the original wording visible, then record the reinspection result beside it. Mark each finding as resolved, still present or not checked. “Not checked” matters when access is blocked or a test cannot be performed. It is different from “not applicable,” which means that item does not relate to the repair.
- Match the location and component. Confirm that the repair is in the same room and at the same fitting or surface described in the report.
- Test the repaired function. Operate a door, run a tap, or check a repaired light using its normal control.
- Inspect the surrounding finish. Look beside a patch for fresh cracks, damp marks, uneven paint or damage.
- Record the observed result. Write what happened, rather than only “OK” or “tested.”
For example, if the report records a slow-draining toilet, run water and observe the flow and floor area. If it records a loose cabinet hinge, open and close the door, then note whether it stays aligned. Match the verification method to the defect. A visual check cannot confirm drainage, while operating a cupboard does not establish that a ceiling stain has dried.
Use clear evidence for complex repairs or recurring problem areas. Take after-photos from a similar angle to the original images, and include a wider view showing the room. Add close-ups of a crack, seal or patch. If a test produces a measurable result, record the actual result and method rather than writing only “passed.” Keep photos, repair notes and relevant receipts with the inspection report.
An invoice confirms that work was billed, but it does not prove that a finding is resolved. Close out an item based on repair evidence and the relevant verification. If a finding remains, describe the gap precisely: “bathroom floor still holds water beside the floor trap” gives a clearer follow-up than “floor not fixed.”
For a BTO, condominium or resale home, this method creates a traceable record of each reported defect and its outcome. If the report and repair evidence leave unresolved items, arrange a follow-up inspection to document the property’s condition against the original findings.
Prime Defectors
Prime Defectors helps homeowners document defects and assess whether repairs have addressed reported issues. Its inspections cover BTO flats, condominiums, landed homes and resale properties, with follow-up inspections to review findings again. The company’s role is inspection and reporting, not carrying out repairs, so the assessment focuses on documenting the property’s condition.
Consider an inspection when repair results remain unclear or records leave outstanding concerns. Contact Prime Defectors to arrange an inspection suited to your property.
Move Forward with a Clear Record in Singapore
A clear decision starts with knowing what remains unresolved and what needs another look. Keep the original inspection report, repair records and latest observations together. This gives the next inspection a useful reference point, whether you are preparing for a Singapore property handover or tracking defects in an occupied home. An organised record also helps you explain which areas need attention without relying on memory.
Prime Defectors Singapore inspects BTO flats, condominiums and landed homes in Singapore, as well as resale properties. Its BTO Defect Inspection, Condo Defect Inspection, Landed Property Defect Inspection and Resale Property Inspection document property condition and identify defects for review. If you need a checklist for a second inspection after repairs, an independent assessment can clarify the repair outcome. Prime Defectors Singapore can help you arrange an inspection suited to your property.
Don’t let hidden issues become expensive repairs. Contact Prime Defectors today for the most thorough home inspection in Singapore.
Frequently Asked Questions
What Is Reinspection After Repairs?
A reinspection is a later assessment to determine whether reported repair work has addressed the original issue. It focuses on the relevant area and connected components that could show whether the fault persists. For example, after replacing a bathroom fitting, the assessment can include the fitting and its surrounding finish. It documents the property’s observed condition; it does not carry out repair work.
What Should the Reinspection Report Include?
A useful report identifies the property area and component assessed, the inspection method, and the observed result. It distinguishes a resolved defect from one that remains and identifies items that could not be checked or did not apply. For example, a report might record that a repaired appliance powered on, while its longer operating cycle was not assessed. Photos and clear descriptions make follow-up easier.
What should a second inspection after repairs include?
The inspection should cover the original defects and any connected components affected by the repair. For example, after replacing a kitchen cabinet, assess its doors, adjacent panels and nearby worktop for fit or damage. Review newly visible concerns too, such as a fresh mark beside a repaired pipe. Tailor the checks to the completed work rather than treating every room or fitting as equally relevant.
How to check repaired plumbing, electrical, air-conditioning, and appliances?
Test each system using its ordinary controls and observe the result. Run the affected tap and check whether water drains as expected; operate the repaired light switch or appliance. For air-conditioning, run the unit and note whether it responds to its controls or shows a visible leak. Do not open electrical fittings or attempt internal repairs. Record unusual noises, smells, leaks or inconsistent operation for qualified assessment.
Should an independent inspector conduct the second inspection?
An independent inspector can provide a separate assessment when the repair result is disputed, unclear or difficult to evaluate. This is especially useful if the original complaint keeps returning or several repairs affect connected areas. Prime Defectors offers follow-up inspections to document property defects. The inspection records observed findings; decisions about further repair work remain separate from the inspection.
How long should I allow for a reinspection after repairs?
Allow time for the inspector to access each affected area and complete the checks required by the repair scope. Inspections typically take 2-4 hours, depending on property size and complexity. A focused check of one repair may differ from a broader assessment of several rooms. Keep relevant spaces accessible and have the original findings and repair records ready to support the inspection.
How much does a property reinspection cost in Singapore?

Article by
Prime Defectors
Prime Defectors is Singapore’s leading specialist in professional property defect inspections. Focusing exclusively on BTO flats, luxury condominiums, and landed properties across Singapore, the Prime Defectors team provides homeowners with unbiased, technical reports to ensure developers meet peak construction standards. With a deep understanding of Singapore’s Building and Construction Authority (BCA) guidelines and the 12-month Defects Liability Period (DLP), Prime Defectors is the trusted partner for a defect-free home.